Guess I have some catching up to do to get you up to date on the work done to set up the two modules I've got.
First of all, one of the Flagstaff Model Railroad Club graciously gave me two 2'x4' modules, in the rough. In other word, nothing more than the wooden platform and legs.This was about mid May, 2010.
Starting off with a clean slate, I decided to go with the FreeMo standard found
here. The two main reasons for going with these as a standard is that it is fairly common, for HO scale, and that it uses
Digitrax as the standard DCC system. Since I already had the system, it seemed like a no-brainer.
Since I had already been in the hobby for nearly 18 years at the time, I already had a bit of supplies. Unfortunately, (or is it fortunately?) the standard for the modules is code 83 track on a cork roadbed, which neither of which were in my vast inventory. Trip to the hobby shop... Nice thing is, that was a fairly inexpensive trip! It was too hard to resist going ahead and lay the track out. Looking at the two modules and wanting a large sweeping curve, I decided that these two modules would become a set to get as much curve as i could get, and still conform to the standards, still. Speaking of standards, I need to check the height from the floor to the rail, which I'm glad to see is only 50" as apposed to nearly 6' which I thought I saw somewhere!
Wiring the two modules, which still isn't truly complete, took forever. Between getting the end terminal strips wired in, both standard busses installed, my DC buss, and feeders to the track. I still need to get the plugs for the track buss, which seem to be almost only by mail-order.
Next was figure out some of the scenery. Part of the challenge was to include buildings I already had, and to get as few additional buildings as reasonable, while keeping it interesting.
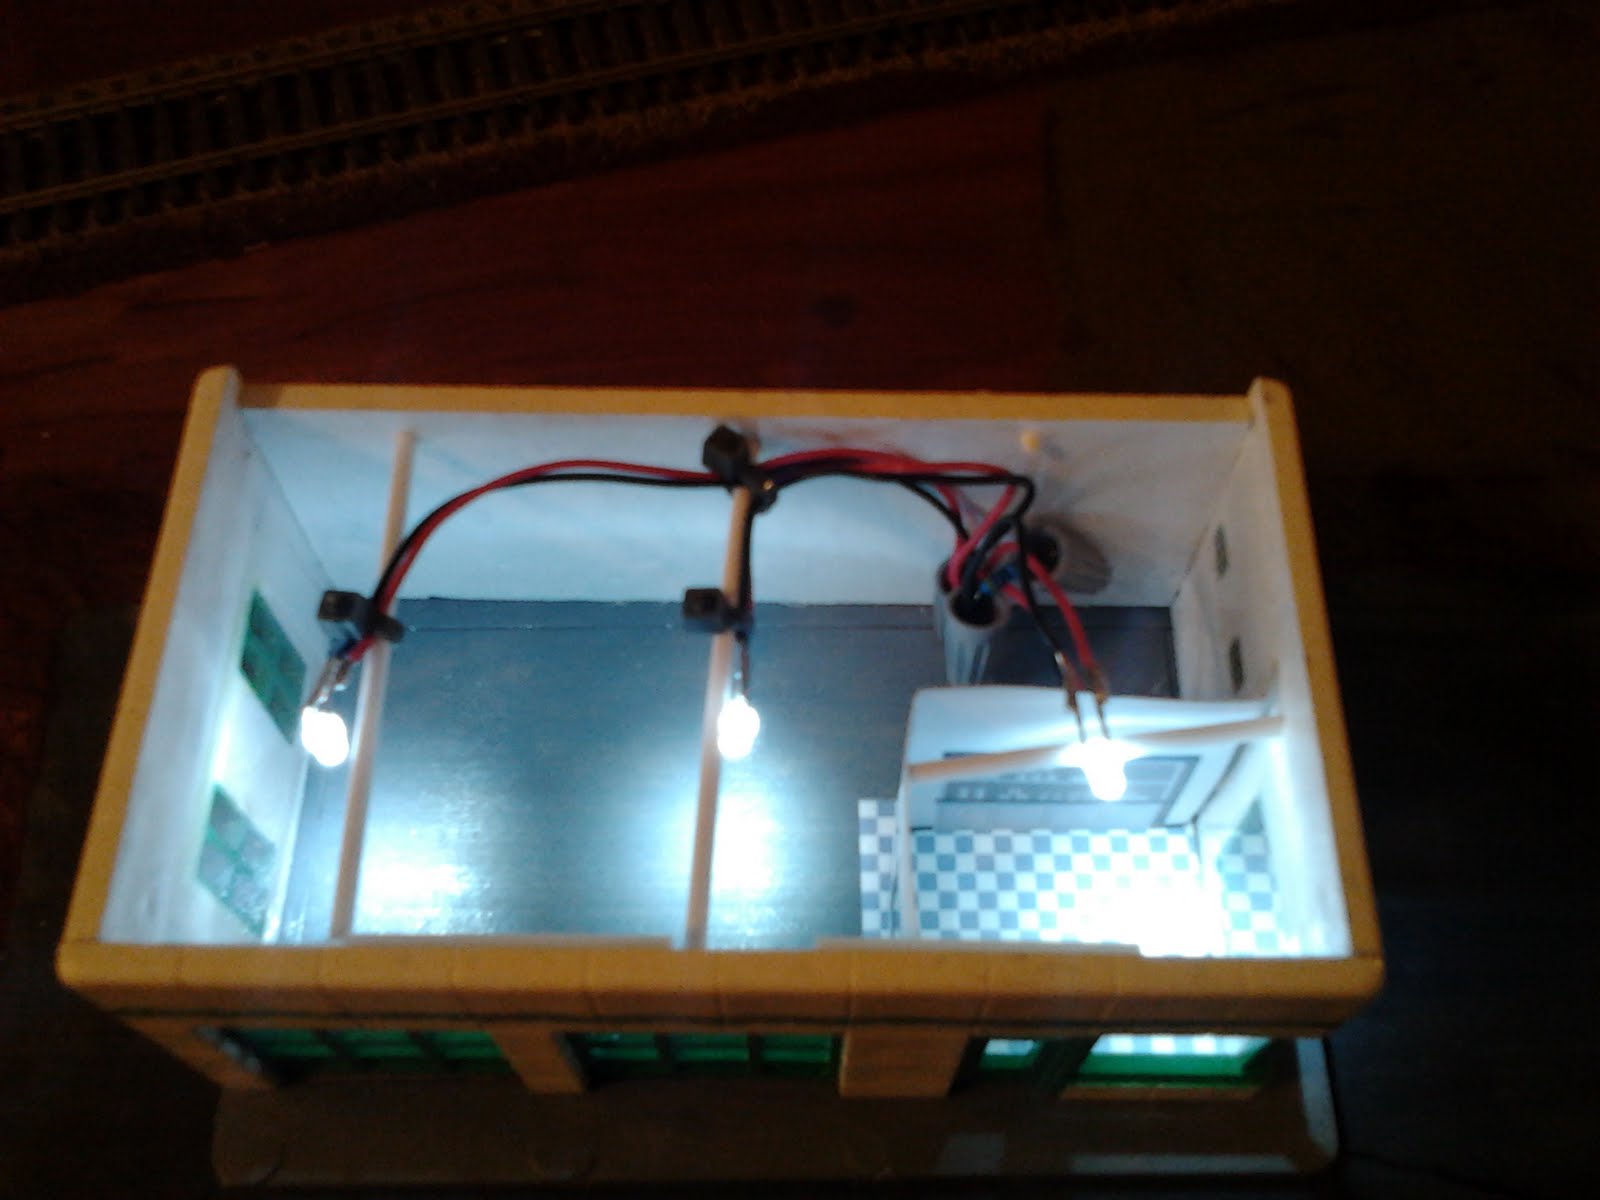
Alright. So before we go exploring this picture, I need to give you a little more background on me. Night operations have always fascinated me. I've been playing around with it for probably around a 12 years. started out in the days of DC operations. That layout had two loops, so two trains could run reasonably at the same time off of the single power pack. Towards one end, I had a single building that lit up with the most rudimentary of systems. A few years ago, I added lighting to the Flagstaff Model Railroad Clubs layout, which is almost exclusively LEDs. Here are a few shots of my handy work!


In this last picture, is one of my favorite things: the 76 ball. That is completely custom down to even the post. It was intended to rotate but the mechanism never really worked out. Still, the ball itself is actually a pingpong ball, which was originally white. I made a custom decal for the 76, and painted the rest of the ball, by hand, with a translucent orange. To finish it off, it is lit by none other than a LED!
So back to my modules!

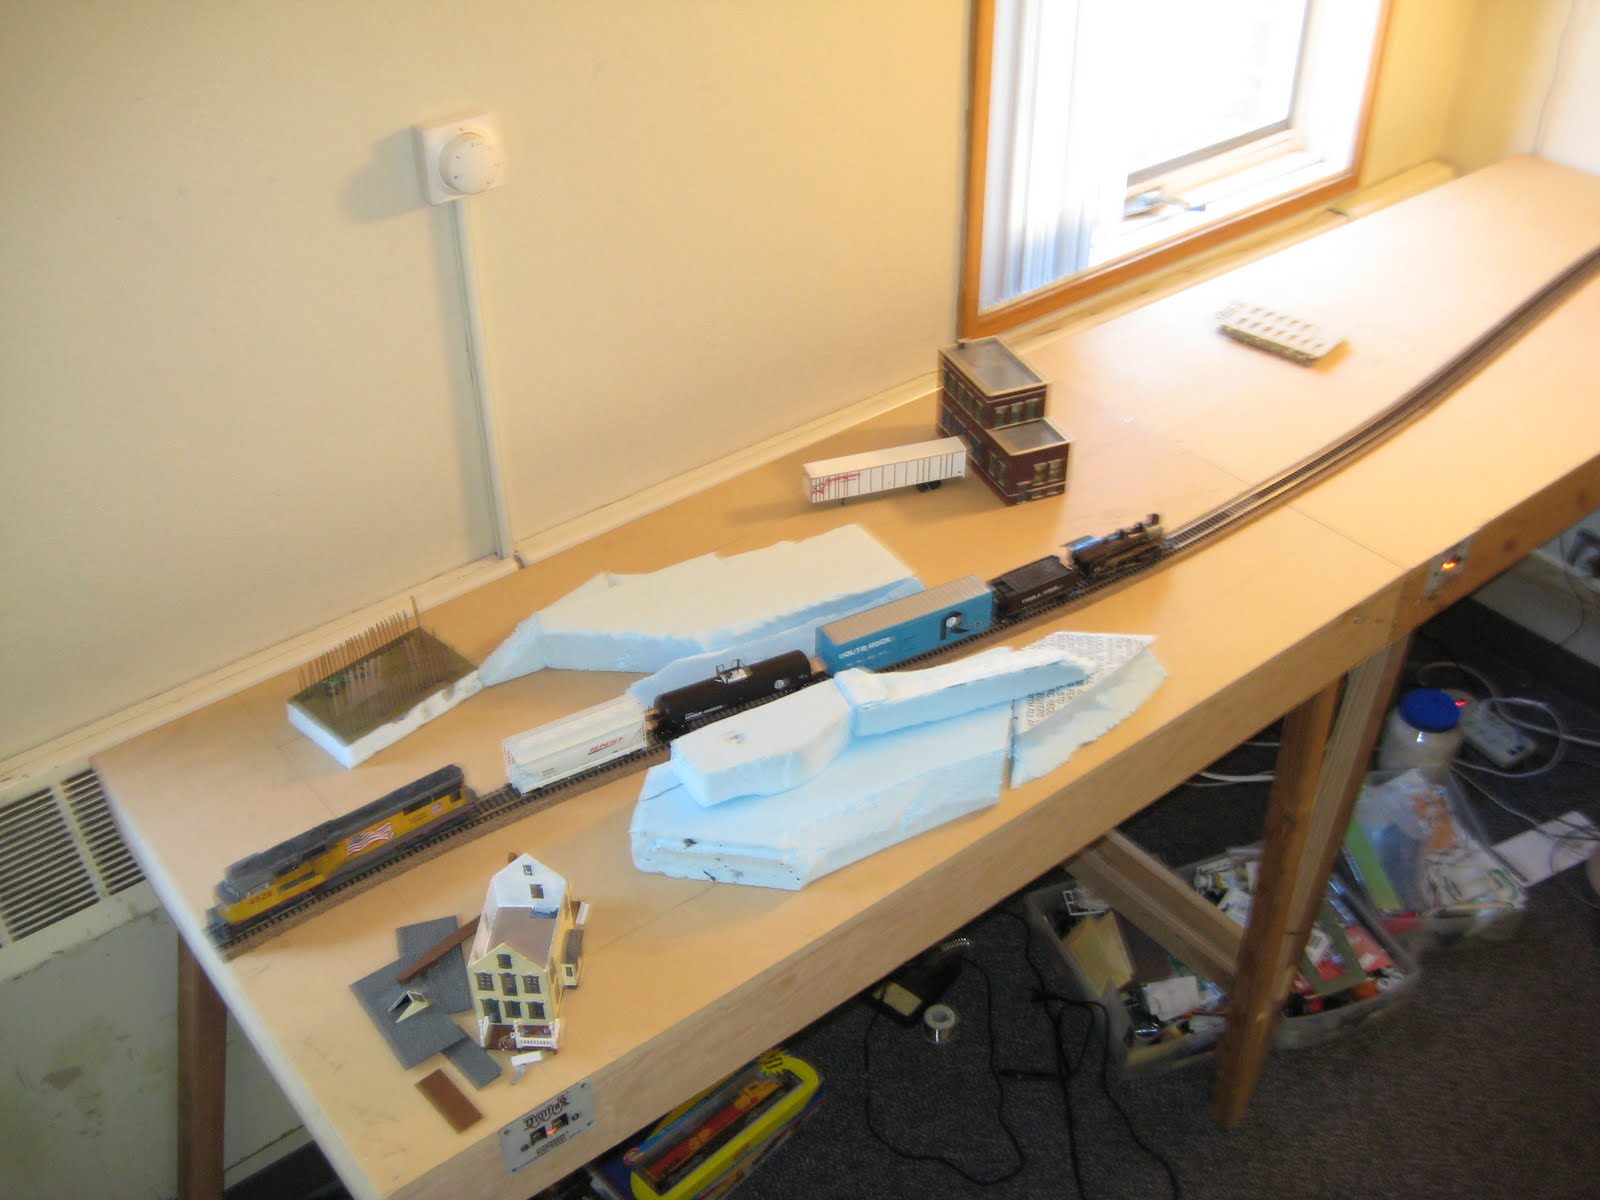
In the lower left hand corner, the farmhouse I've had for a few years, which was a little bit of its own experiment, will have the upstairs lit. Up there, the wife is looking out the window, while her husband is downstairs on a porch, that will hopefully be lit by surface mount LEDs, playing checkers with some buds. The kind of green patch, nearly directly above it, is a custom barn that has seen better days. It was originally going to be part of a competition at the the Club. Instead, since I was the one that bought the materials for it on my dime, I decided I didn't want to enter it. I still haven't finished it but it certainly will be a focal point especially with a light in it! The warehouse with the trailer backed up to it, I've also had for a few years. It still needs some work, and I've yet to decide if it will actually have a light in it. Odds are, it will. The last building in the picture looks more like a pile of parts, not too far off of the color of the table. Its been built up, with no interior yet. I'm thinking about a couple of the surface mount LEDs in the entry ways, stairways, and the bottom floor for lease. Haven't really decided what to do with the top floor yet.
Also in this picture, the start of the hills can be seen. That curve still looks sharp to me. Just a couple of days ago, a super-elevated the curves, which I think breaks the standard for FreeMo. Most people tend to overdo it, which causes more problems than it helps prevent. If you actually look at what it is supposed to be, most of the time it is only about half a rail difference in height. Since I only have the two modules, I can't really tell how a long train looks on it yet but it already looks awesome! Bellow are pictures from 8/12/10. You can see that the additional buildings have been bought now.
And some more progress by 8/26/10. The buildings have been built up, in at least in their basic form. The main road has also bee added.
And even more progress by 2/26/11! A little bit of scenery has been added, and one can start to get the feel of the modules. Trees are going to be added when this base level gets finished up.
Dang. How does it always happen that projects start up late at night?
Anyways, I'll show current progress with lighting the gas station to the right in this last picture and talk about the timeframe and location tomorrow. Until then, where's that light switch?!