Sunday, December 9, 2012

Where did the time go?

What happened to November? Time just seems to be going by so incredibly quick with finals next week. Anyways, for those still following this, there has been a bit of work on a fairly old project of mine; the (semi) abandoned barn!

I installed a single LED to light it up.


With part of the center dividing wall finished.


Even more of the dividing wall completed along with a few rafters in place.


Look at all of those rafters and how all of the boards on the middle dividing wall look!


A test fitting of part of the roof for the barn. Note that it will be rusted out a bit and that towards the far end, there will be a partial collapse.


Starting on the siding.


One wall is essentially done!


You can see how the boards are layered on each other just like the real thing!


Also in the process are diaphragms for my passenger car fleet. Due to having a SP Consolidation, an excursion train is now in the works!


Let's see how much more progress I can make by the end of the year!


Tuesday, October 9, 2012

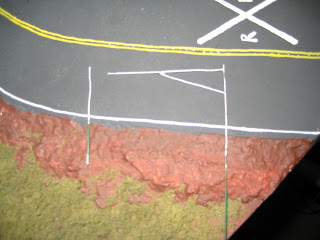
The grade crossing is done! (almost...)

So got the grade crossing motor mount designed and cut...


Even installed!


The mechanism in motion...

And finally the grade crossing in motion! (Not as smooth as I want it to be. I'm hoping it just needs a little bit of a break in period...)


And a here is the IR LED and receiver mounted at a diagonal.


Hardly even noticeable in the middle of the track!

Also I mocked up the location of the SWIFT truck being stuck!


That's it for this month. Maybe I'll have the tip of my hat to my past [more] done for next month!

Sunday, September 16, 2012

Electrical Work...

So more work under the layout occurred this month... And the bad thing is that it's still not done!


Anyways, due to the potential voltage variation on a modular set-up and the delicate nature of maintaining certain light levels on especially outdoor lights, voltage regulators are a must.


Now this may not seem important but let's look long term. The Walthers streetlights like to operate, and are rated for 12 volts. Running them at 16 volts will not blow the bulbs right away and put off more light. With them up at that voltage, they really put off some light. Seems a bit too bright though. Reducing the voltage considerably extends the life of any bulb. (This hasn't been to thoroughly tested on LEDs due to their extremely long life under normal conditions.) With incandescent lights in particular, they get very hot when operated above their voltage, thus having the potential of melting any close plastics.


I finally came up with a solution for my grade crossing. It's only in the early part of the installation but the feel is already coming across. I have one of the ITTP HQ sound modules hooked up to a 3" speaker. Only one of the infrared detectors has been installed for the Signalogic circuit, which triggers the sound. (Hopefully the crossing arms soon, too!) They recommended installing the sensor and light at an angle relative to each other for reduced issues with false triggering with lights. Since these won't always have the same lighting on them at all of the potential locations these will be set up at, less headaches are a must. I went the infrared route due to my liking of night ops, and let's face it, photocells just can't do it. I'll show the location of these later on. ; ) (NJI crossing gates)


I haven't gotten a good shot of the custom table and chairs in the out of business café, so here it is. I still need to install the glass and the upstairs walls and lights but it looks good so far!


See you next month!

Sunday, August 19, 2012

Prepping for school!

For those of you that don't know, I'm headed by to college this semester! So this summer has been busy trying to save up as much at my now former job as a truck driver. With the end of that job, I've fully moved back in with the folks, which feels somewhat strange in itself considering I've only really visited periodically for the past 5 years. With that, most of the time since I've quit was used to get moved back in to the point of actually being able to utilize my room more fully along with setting up my old 10 gallon aquarium, which has a few new features not seen back in 2000, when the tank was made!

And now back to the trains! A few more voltage regulators have been installed for Durkee Road. They've been installed with a terminal strip between them and the lights, with a few extra spots for future lights. Currently the street lamps and the porch light to the closed café have been done up with the other two lights planned to have one, too.


I've built up a Details West electrical shed for the grade crossing. It still needs to be painted, which might just happen for the next post. Hopefully I can figure out a way for it to have its light, possibly using fiber optics.


Next time the grade crossing should actually have its new gates and IR detection system installed. Might just have to get video of it for next time but don't hold your breath!


I can't remember if I've written about the gate yet or not, so here it is. I made it now a little while ago for the entrance to the warehouse, which SWIFT was not supposed to leave out of. It will likely still be a bit until I install it though.

Happy Modeling!


Sunday, June 3, 2012

Lighting and interiors galore!

So this trip home I got the chance to add an interior to the gas station, at least the office.


Durkee Road also had a street light added.


Promptly followed by an entry light (a surface mount led which needs to be dimmed a bit!) and another street light.


And I couldn't resist having RG 5371 give a photo op at the grade crossing!


A not likely noticed update is that a voltage regulator was added to the primary module, with plans on doing the same for the other. Next update will likely be in mid August. Stay safe over the summer!

Monday, April 9, 2012

Little news...

Well last time back at home, I didn't really get that much done. Most of the work was done on standardizing the fleet, and let's face it, I wasn't home for very long. I did get the farmhouse lit up though with the porch attatched. The porch lights are even dimmed down to a reasonable level now!


Now those LEDs are a little on the large side but not too bad in person. I did weather another car, along with adding graffiti to it. Here is a couple of pictures of it at the grade crossing at Durkee Road, which happens to be the real point these modules are based on!


Of note, I will be both changing the scenery to that more like the scenery to around the gas station and adding street lights to the main drag. The lights have been purchased and are waiting on, from the photo above's perspective, the left side's sidewalk to be completed. An idea I'm toying around with is having a SWIFT driver stuck making a left turn from the side street onto the main drag with their hazard lights on due to not being able to make the turn in the amount of space provided. Might just have to get the WOodland Scenics police offices there too! And if you're asking, "Why a SWIFT truck?" I Sure Wish I Finished Training! (and that's one of the nice acronyms!)

Monday, February 6, 2012

More scenery!

Alright, again it’s been busy. That being said, this update from work done over the winter holidays was only captured on my camera phone, so please pardon the quality ahead of time.
That being said, great progress was made around the gas station and across the tracks from it. The basic earth colored ground foam was applied to both sides. On top of that I’m applying another color of ground foam. I think it is yellow grass, but seeing as I’m in LA as I am typing this, I really can’t check this.

The other big news is that I’ve started to ballast the main! If one looks closely, they might just notice that I didn’t ballast all the way to the end of the module. The reason behind it is that the FreeMo standard requires one to use fine light grey ballast. I’ve not been to big of a fan of this, so in order to keep some level of uniformity, these modules will have the standard on the very end, while having my 50/50 mix of light grey and medium grey for the rest. As the matte medium was setting, I realized that it was fairly hard to actually see any difference of the color on its own. Maybe it will show up more with the non-mixed ballast is applied. Of note, I discovered the hard way that the matte medium that I got needed to be diluted 50/50 with water. I may get to do some more clean-up when I get back...
Staying along to Main Street, I wasn’t really sure what to do with the remaining space beside the lone DPM model. The answer... another DPM kit!


Now I couldn’t decide wether or not to make this int a small park, farmers market, or who knows what. Just for some reason, this kit caught my eye, and the preview picture even shows it next to the existing building! Interestingly, the reverse is not true!
Moving all the way down to the farmhouse area, a bit of progress was made. got the earth ground foam down, some of it applied to hill, and even a few trees made up! I even added lights to the front porch! I did try using Hobb-e-tack for the figures, but will likely change that to some regular glue. The reason behind that is just spending a single night on its side caused some of the figures to shift or even fall off! Not good!
Maybe I’ll be able to get things looking even better next time!