Showing posts with label lighting. Show all posts

Sunday, December 9, 2012

Where did the time go?

What happened to November? Time just seems to be going by so incredibly quick with finals next week. Anyways, for those still following this, there has been a bit of work on a fairly old project of mine; the (semi) abandoned barn!

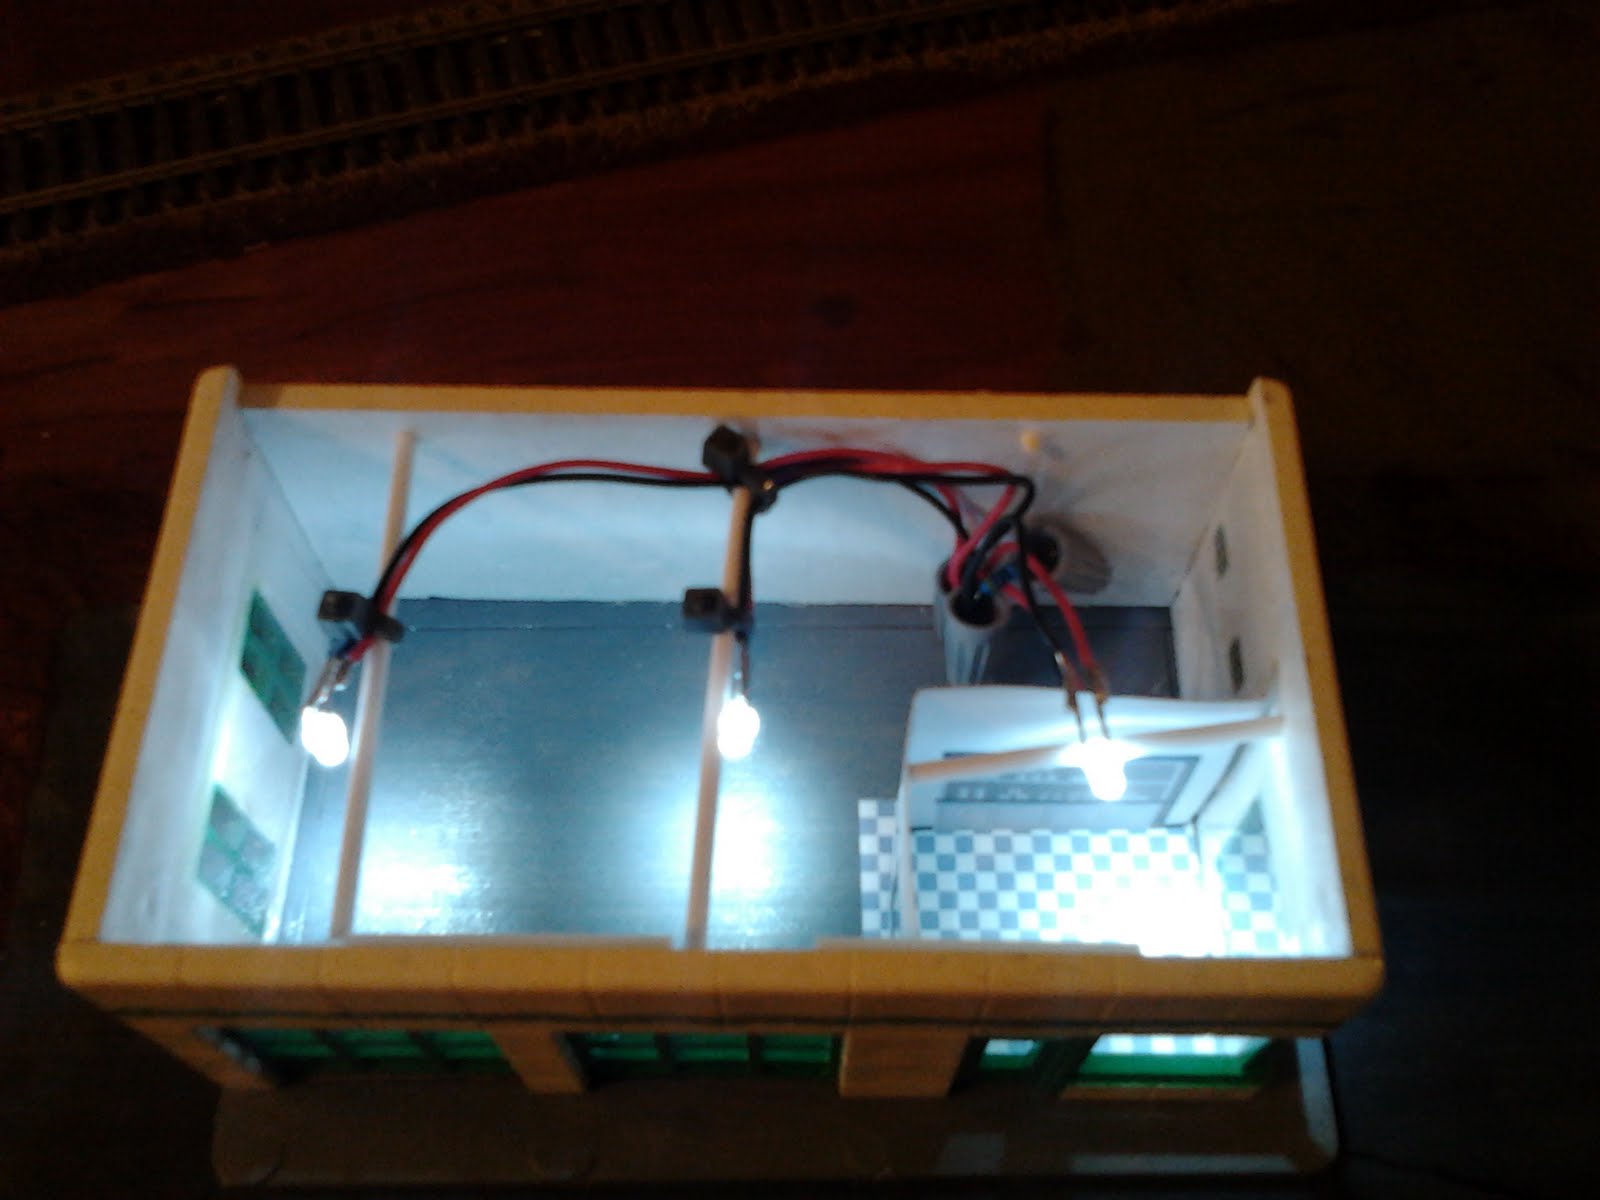
I installed a single LED to light it up.


With part of the center dividing wall finished.


Even more of the dividing wall completed along with a few rafters in place.


Look at all of those rafters and how all of the boards on the middle dividing wall look!


A test fitting of part of the roof for the barn. Note that it will be rusted out a bit and that towards the far end, there will be a partial collapse.


Starting on the siding.


One wall is essentially done!


You can see how the boards are layered on each other just like the real thing!


Also in the process are diaphragms for my passenger car fleet. Due to having a SP Consolidation, an excursion train is now in the works!


Let's see how much more progress I can make by the end of the year!


Sunday, September 16, 2012

Electrical Work...

So more work under the layout occurred this month... And the bad thing is that it's still not done!


Anyways, due to the potential voltage variation on a modular set-up and the delicate nature of maintaining certain light levels on especially outdoor lights, voltage regulators are a must.


Now this may not seem important but let's look long term. The Walthers streetlights like to operate, and are rated for 12 volts. Running them at 16 volts will not blow the bulbs right away and put off more light. With them up at that voltage, they really put off some light. Seems a bit too bright though. Reducing the voltage considerably extends the life of any bulb. (This hasn't been to thoroughly tested on LEDs due to their extremely long life under normal conditions.) With incandescent lights in particular, they get very hot when operated above their voltage, thus having the potential of melting any close plastics.


I finally came up with a solution for my grade crossing. It's only in the early part of the installation but the feel is already coming across. I have one of the ITTP HQ sound modules hooked up to a 3" speaker. Only one of the infrared detectors has been installed for the Signalogic circuit, which triggers the sound. (Hopefully the crossing arms soon, too!) They recommended installing the sensor and light at an angle relative to each other for reduced issues with false triggering with lights. Since these won't always have the same lighting on them at all of the potential locations these will be set up at, less headaches are a must. I went the infrared route due to my liking of night ops, and let's face it, photocells just can't do it. I'll show the location of these later on. ; ) (NJI crossing gates)


I haven't gotten a good shot of the custom table and chairs in the out of business café, so here it is. I still need to install the glass and the upstairs walls and lights but it looks good so far!


See you next month!

Sunday, August 19, 2012

Prepping for school!

For those of you that don't know, I'm headed by to college this semester! So this summer has been busy trying to save up as much at my now former job as a truck driver. With the end of that job, I've fully moved back in with the folks, which feels somewhat strange in itself considering I've only really visited periodically for the past 5 years. With that, most of the time since I've quit was used to get moved back in to the point of actually being able to utilize my room more fully along with setting up my old 10 gallon aquarium, which has a few new features not seen back in 2000, when the tank was made!

And now back to the trains! A few more voltage regulators have been installed for Durkee Road. They've been installed with a terminal strip between them and the lights, with a few extra spots for future lights. Currently the street lamps and the porch light to the closed café have been done up with the other two lights planned to have one, too.


I've built up a Details West electrical shed for the grade crossing. It still needs to be painted, which might just happen for the next post. Hopefully I can figure out a way for it to have its light, possibly using fiber optics.


Next time the grade crossing should actually have its new gates and IR detection system installed. Might just have to get video of it for next time but don't hold your breath!


I can't remember if I've written about the gate yet or not, so here it is. I made it now a little while ago for the entrance to the warehouse, which SWIFT was not supposed to leave out of. It will likely still be a bit until I install it though.

Happy Modeling!


Sunday, June 3, 2012

Lighting and interiors galore!

So this trip home I got the chance to add an interior to the gas station, at least the office.


Durkee Road also had a street light added.


Promptly followed by an entry light (a surface mount led which needs to be dimmed a bit!) and another street light.


And I couldn't resist having RG 5371 give a photo op at the grade crossing!


A not likely noticed update is that a voltage regulator was added to the primary module, with plans on doing the same for the other. Next update will likely be in mid August. Stay safe over the summer!

Monday, April 9, 2012

Little news...

Well last time back at home, I didn't really get that much done. Most of the work was done on standardizing the fleet, and let's face it, I wasn't home for very long. I did get the farmhouse lit up though with the porch attatched. The porch lights are even dimmed down to a reasonable level now!


Now those LEDs are a little on the large side but not too bad in person. I did weather another car, along with adding graffiti to it. Here is a couple of pictures of it at the grade crossing at Durkee Road, which happens to be the real point these modules are based on!


Of note, I will be both changing the scenery to that more like the scenery to around the gas station and adding street lights to the main drag. The lights have been purchased and are waiting on, from the photo above's perspective, the left side's sidewalk to be completed. An idea I'm toying around with is having a SWIFT driver stuck making a left turn from the side street onto the main drag with their hazard lights on due to not being able to make the turn in the amount of space provided. Might just have to get the WOodland Scenics police offices there too! And if you're asking, "Why a SWIFT truck?" I Sure Wish I Finished Training! (and that's one of the nice acronyms!)

Tuesday, November 1, 2011

Another not too exciting month...

This time was again, not very exciting. Mostly got the room cleaned up...

Anyways, I finally got the other two Digitrax panels mounted and mostly hooked up. One of the panels isn't hooked up to the track yet but that really should be fairly quick.

I did finally finish getting the interior of the gas station painted well enough that the black isn't really showing through. Next time, I get to reassemble it! (Sorry no pictures this time, again!)

I got some more LEDs in. I doubt I'll need to order any more any time soon! I did also get some fiber optic cable (.75mm). Might just have to do some experimenting!

The other project that got started is a rotary car dump! This thing is gonna be big, too! The current design is calling for it to be able to dump two cars at a time! The only thing really close is a Walthers kit that is out of production, the Walthers paper mill version, or a custom version! I'm going the custom version for both the length issue and the durability issue. Online research turned up that despite the Walthers kit being designed to be motorized, it just doesn't hold up well to extensive use. The other issue is that due to the kit being made out of plastic, it doesn't have the weight behind it to run very well. Hopefully this works out well! And yes, I found a few options for WORKING rotary couplers!

Next time won't be until Christmas that I get home but it's doubtful that I'll get anything done. Maybe I can make it to the Gadison Pacific's swap in January!

Sunday, August 14, 2011

Lighting issues...

Well I did do work on the modules in July but didn’t get around to posting anything until now.

Right before I posted last time, I discovered that, to my dismay, that despite the plastic being so thick and being painted on the outside, that there was still light showing though. The amount wasn’t very substantial. Wasn’t remotely noticeable with the lights on. It honestly was only kind of noticeable, from the right angles, with the lights off. So my gamble earlier didn’t pay off. The real reason I didn’t want to paint the walls the standard black is that I in fact, want them white, or at least white with grease and other grime on the walls that one expects to see in a shop.


Now that they are painted black, I tried using a heavy white paint called Gheso. Unfortunately I think that mine has been sitting around a little too long, since it really isn’t mixing up all that well. Guess I’ll have to get some newer stuff when I get back in town.
Other work that I did this time was painting the track, which always is a pain. I’ve yet to test the track power but should be fine due to the soldered rail joints.
The previous time, I actually worked for the first time with the rubber rock molds and casting material that Woodland Scenics makes.Wasn’t too happy that the casting material didn’t set up quite right for the entire mold, but in turn, I got a number of smaller rocks to play around with. Might just have to make a few more to scatter around still!


Durning the process of blending the casts in, I decided that this material should also work for getting the "abandoned barn's" foundation blended into the surrounding area.


The challenge is that I haven't both finished it, or even truly finish the concept in my head yet. I know that the tractor that is shown in pieces, will be put back together and put into one side or the other, considering it has two bays. I also know that I want to add some lighting into it to. I still like calling it abandoned, despite the fact that it is only really neglected. The other thing I've been thinking about doing is adding a small camera to the bay that looks out toward the tracks. Since it is a module where others are supposed to get to see it, might just be fun! Maybe one of these times I will finally finish it...

I'm not sure I'll get all that much time to work on them this next time I'm home. We'll just have to see!


Sunday, June 26, 2011

Lighting the gas station!

As I said in my last post, I said I did the night lighting on the Flagstaff club layout. Using that experience, I'm playing around with a new method.


So here's the gas station in question. Made by City Classics, it is fairly plain, just like a standard Design Preservation Model (DPM). So if one is observant, you'll note the fuel island missing its pumps. Those are a later project since I'm hoping on putting a few lights in those just to give it a little more character.

The building came with an insert for the store, which isn't awesome but certainly a good starting point. The bad thing about this kit though is that the floor didn't come leveled out with the rest of it on the outside. In other words, one had to add their own material inside the building to get it to where the "concrete" indicates it should be. In my case, I chose a wood floor, really due to that being what I had on hand.


Lights in real buildings are, for the most part, mounted on or near the ceiling. Now getting lights to stay in place can be tricky on even a permanent layout can be difficult. Remember that these are modules. They are intended to be moved from location to location, so there are many more forces in play here. Most layouts don't have to worry about keeping EVERYTHING in place in the event that it gets moved. I get to make sure I can shake it, while it is even upside down, and nothing moves or comes free. Ok, the roofs of the buildings will come off... The buildings don't! (or at least soon enough) So that means I can't just cram the bulb into the spot and quickly get the roof into place while hoping nothing's moved. Hopefully the answer are those two beams now installed in the building.  a few more zip ties and things might even look nice!


And now for the lights!


Guess this means I get to put stuff inside now! That'll be next month's project!


Saturday, June 25, 2011

Starting up...

Guess I have some catching up to do to get you up to date on the work done to set up the two modules I've got.

First of all, one of the Flagstaff Model Railroad Club graciously gave me two 2'x4' modules, in the rough. In other word, nothing more than the wooden platform and legs.This was about mid May, 2010.

Starting off with a clean slate, I decided to go with the FreeMo standard found here. The two main reasons for going with these as a standard is that it is fairly common, for HO scale, and that it uses Digitrax as the standard DCC system. Since I already had the system, it seemed like a no-brainer.

Since I had already been in the hobby for nearly 18 years at the time, I already had a bit of supplies. Unfortunately, (or is it fortunately?) the standard for the modules is code 83 track on a cork roadbed, which neither of which were in my vast inventory. Trip to the hobby shop... Nice thing is, that was a fairly inexpensive trip! It was too hard to resist going ahead and lay the track out. Looking at the two modules and wanting a large sweeping curve, I decided that these two modules would become a set to get as much curve as i could get, and still conform to the standards, still. Speaking of standards, I need to check the height from the floor to the rail, which I'm glad to see is only 50" as apposed to nearly 6' which I thought I saw somewhere!

Wiring the two modules, which still isn't truly complete, took forever. Between getting the end terminal strips wired in, both standard busses installed, my DC buss, and feeders to the track. I still need to get the plugs for the track buss, which seem to be almost only by mail-order.

Next was figure out some of the scenery. Part of the challenge was to include buildings I already had, and to get as few additional buildings as reasonable, while keeping it interesting. 


Alright. So before we go exploring this picture, I need to give you a little more background on me. Night operations have always fascinated me. I've been playing around with it for probably around a 12 years. started out in the days of DC operations. That layout had two loops, so two trains could run reasonably at the same time off of the single power pack. Towards one end, I had a single building that lit up with the most rudimentary of systems. A few years ago, I added lighting to the Flagstaff Model Railroad Clubs layout, which is almost exclusively LEDs. Here are a few shots of my handy work!


In this last picture, is one of my favorite things: the 76 ball. That is completely custom down to even the post. It was intended to rotate but the mechanism never really worked out. Still, the ball itself is actually a pingpong ball, which was originally white. I made a custom decal for the 76, and painted the rest of the ball, by hand, with a translucent orange. To finish it off, it is lit by none other than a LED!

So back to my modules!


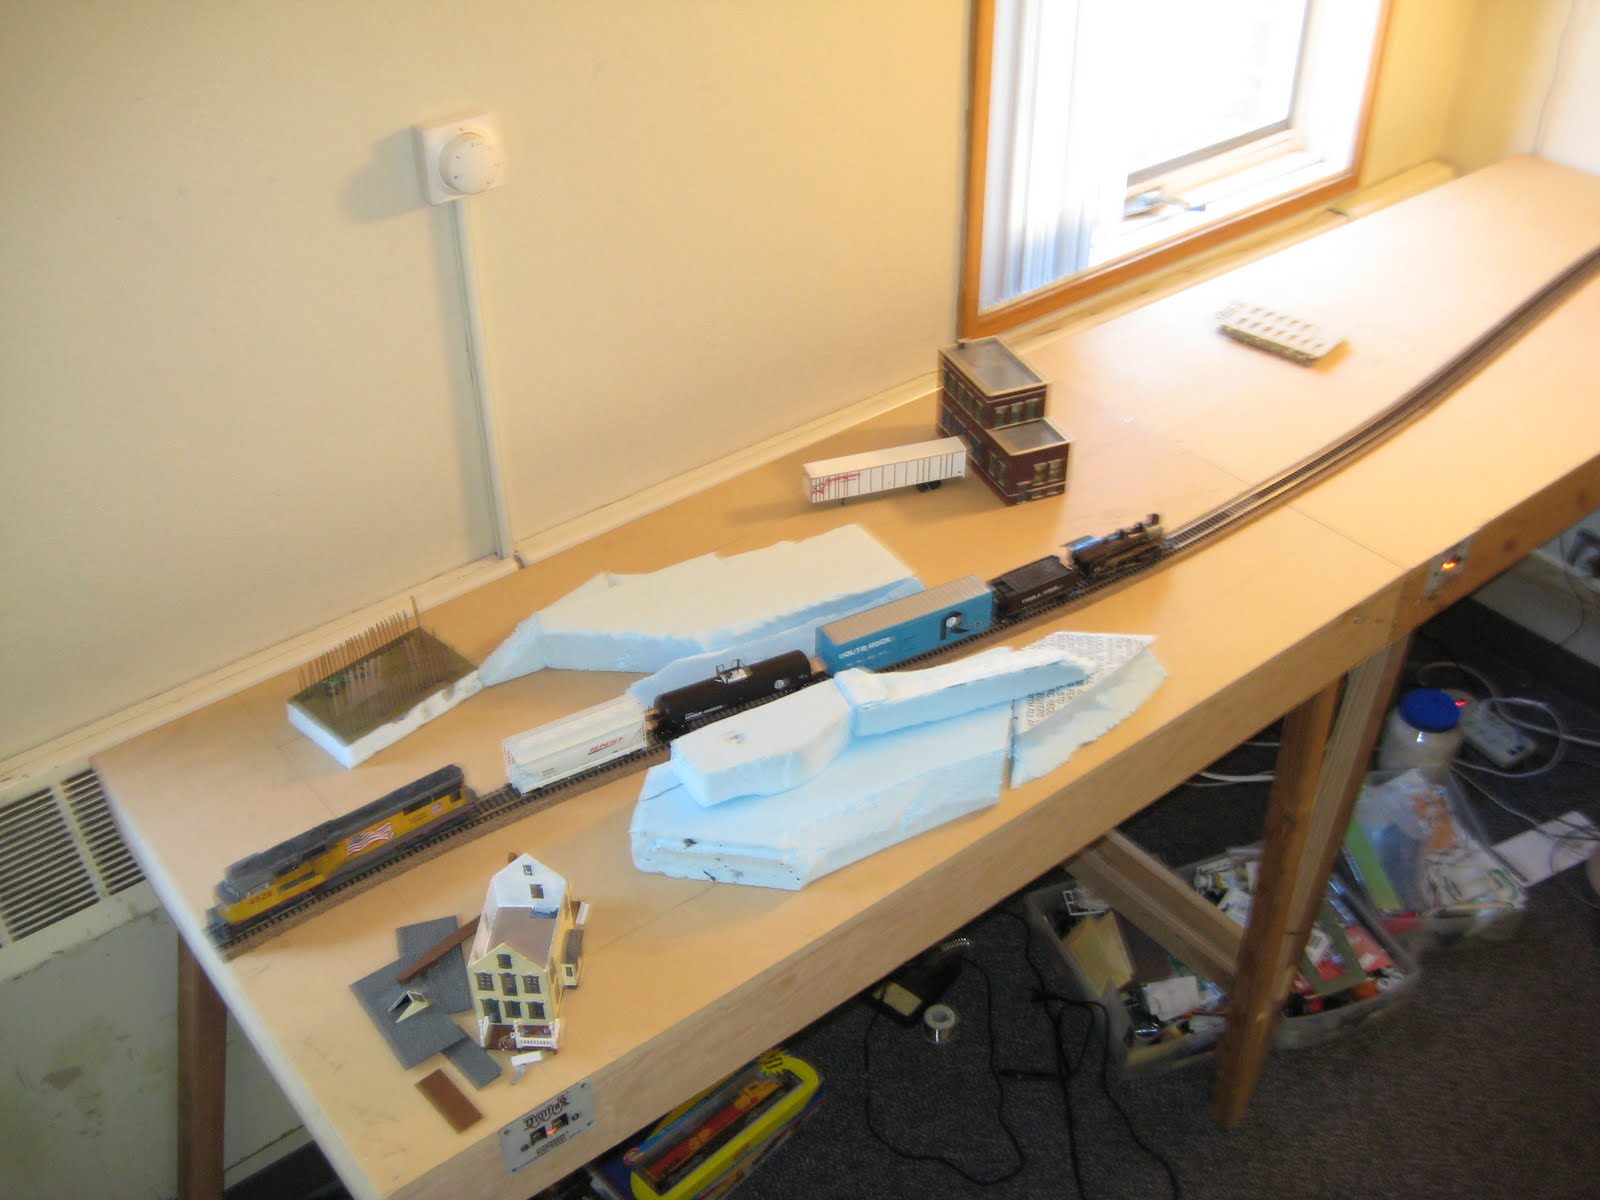
In the lower left hand corner, the farmhouse I've had for a few years, which was a little bit of its own experiment, will have the upstairs lit. Up there, the wife is looking out the window, while her husband is downstairs on a porch, that will hopefully be lit by surface mount LEDs, playing checkers with some buds. The kind of green patch, nearly directly above it, is a custom barn that has seen better days. It was originally going to be part of a competition at the the Club. Instead, since I was the one that bought the materials for it on my dime, I decided I didn't want to enter it. I still haven't finished it but it certainly will be a focal point especially with a light in it! The warehouse with the trailer backed up to it, I've also had for a few years. It still needs some work, and I've yet to decide if it will actually have a light in it. Odds are, it will. The last building in the picture looks more like a pile of parts, not too far off of the color of the table. Its been built up, with no interior yet. I'm thinking about a couple of the surface mount LEDs in the entry ways, stairways, and the bottom floor for lease. Haven't really decided what to do with the top floor yet.

Also in this picture, the start of the hills can be seen. That curve still looks sharp to me. Just a couple of days ago, a super-elevated the curves, which I think breaks the standard for FreeMo. Most people tend to overdo it, which causes more problems than it helps prevent. If you actually look at what it is supposed to be, most of the time it is only about half a rail difference in height. Since I only have the two modules, I can't really tell how a long train looks on it yet but it already looks awesome! Bellow are pictures from 8/12/10. You can see that the additional buildings have been bought now.


And some more progress by 8/26/10. The buildings have been built up, in at least in their basic form. The main road has also bee added.


And even more progress by 2/26/11! A little bit of scenery has been added, and one can start to get the feel of the modules. Trees are going to be added when this base level gets finished up.


Dang. How does it always happen that projects start up late at night?

Anyways, I'll show current progress with lighting the gas station to the right in this last picture and talk about the timeframe and location tomorrow. Until then, where's that light switch?!